Boss 1: Balnazzar
Last updated: 5/9/25
When pulling Balnazzar, you should fight him around the fountain where he spawns.
Previously, it was worth it to try and pull him far away so that you’d get free damage on him as he ran over to transition from phase 1 to 2. However, his movement speed was silently buffed during launch week and it’s no longer worth doing this. You lose far more damage trying to position him in the first place than you gain by damaging him for those few seconds for free, and it also forces all of your DPS to adjust to new positions rather than allowing them to set up in those positions in the first place. Prior to that change, you’d gain 20-30 seconds of free damage; now you gain like 5, and he outruns melee so your damage is halved during those 5 too.
Balnazzar has a 10 minute berserk timer that acts as a hard DPS check for this fight.
Phase 1
Begins at 100%, ends at 70%.
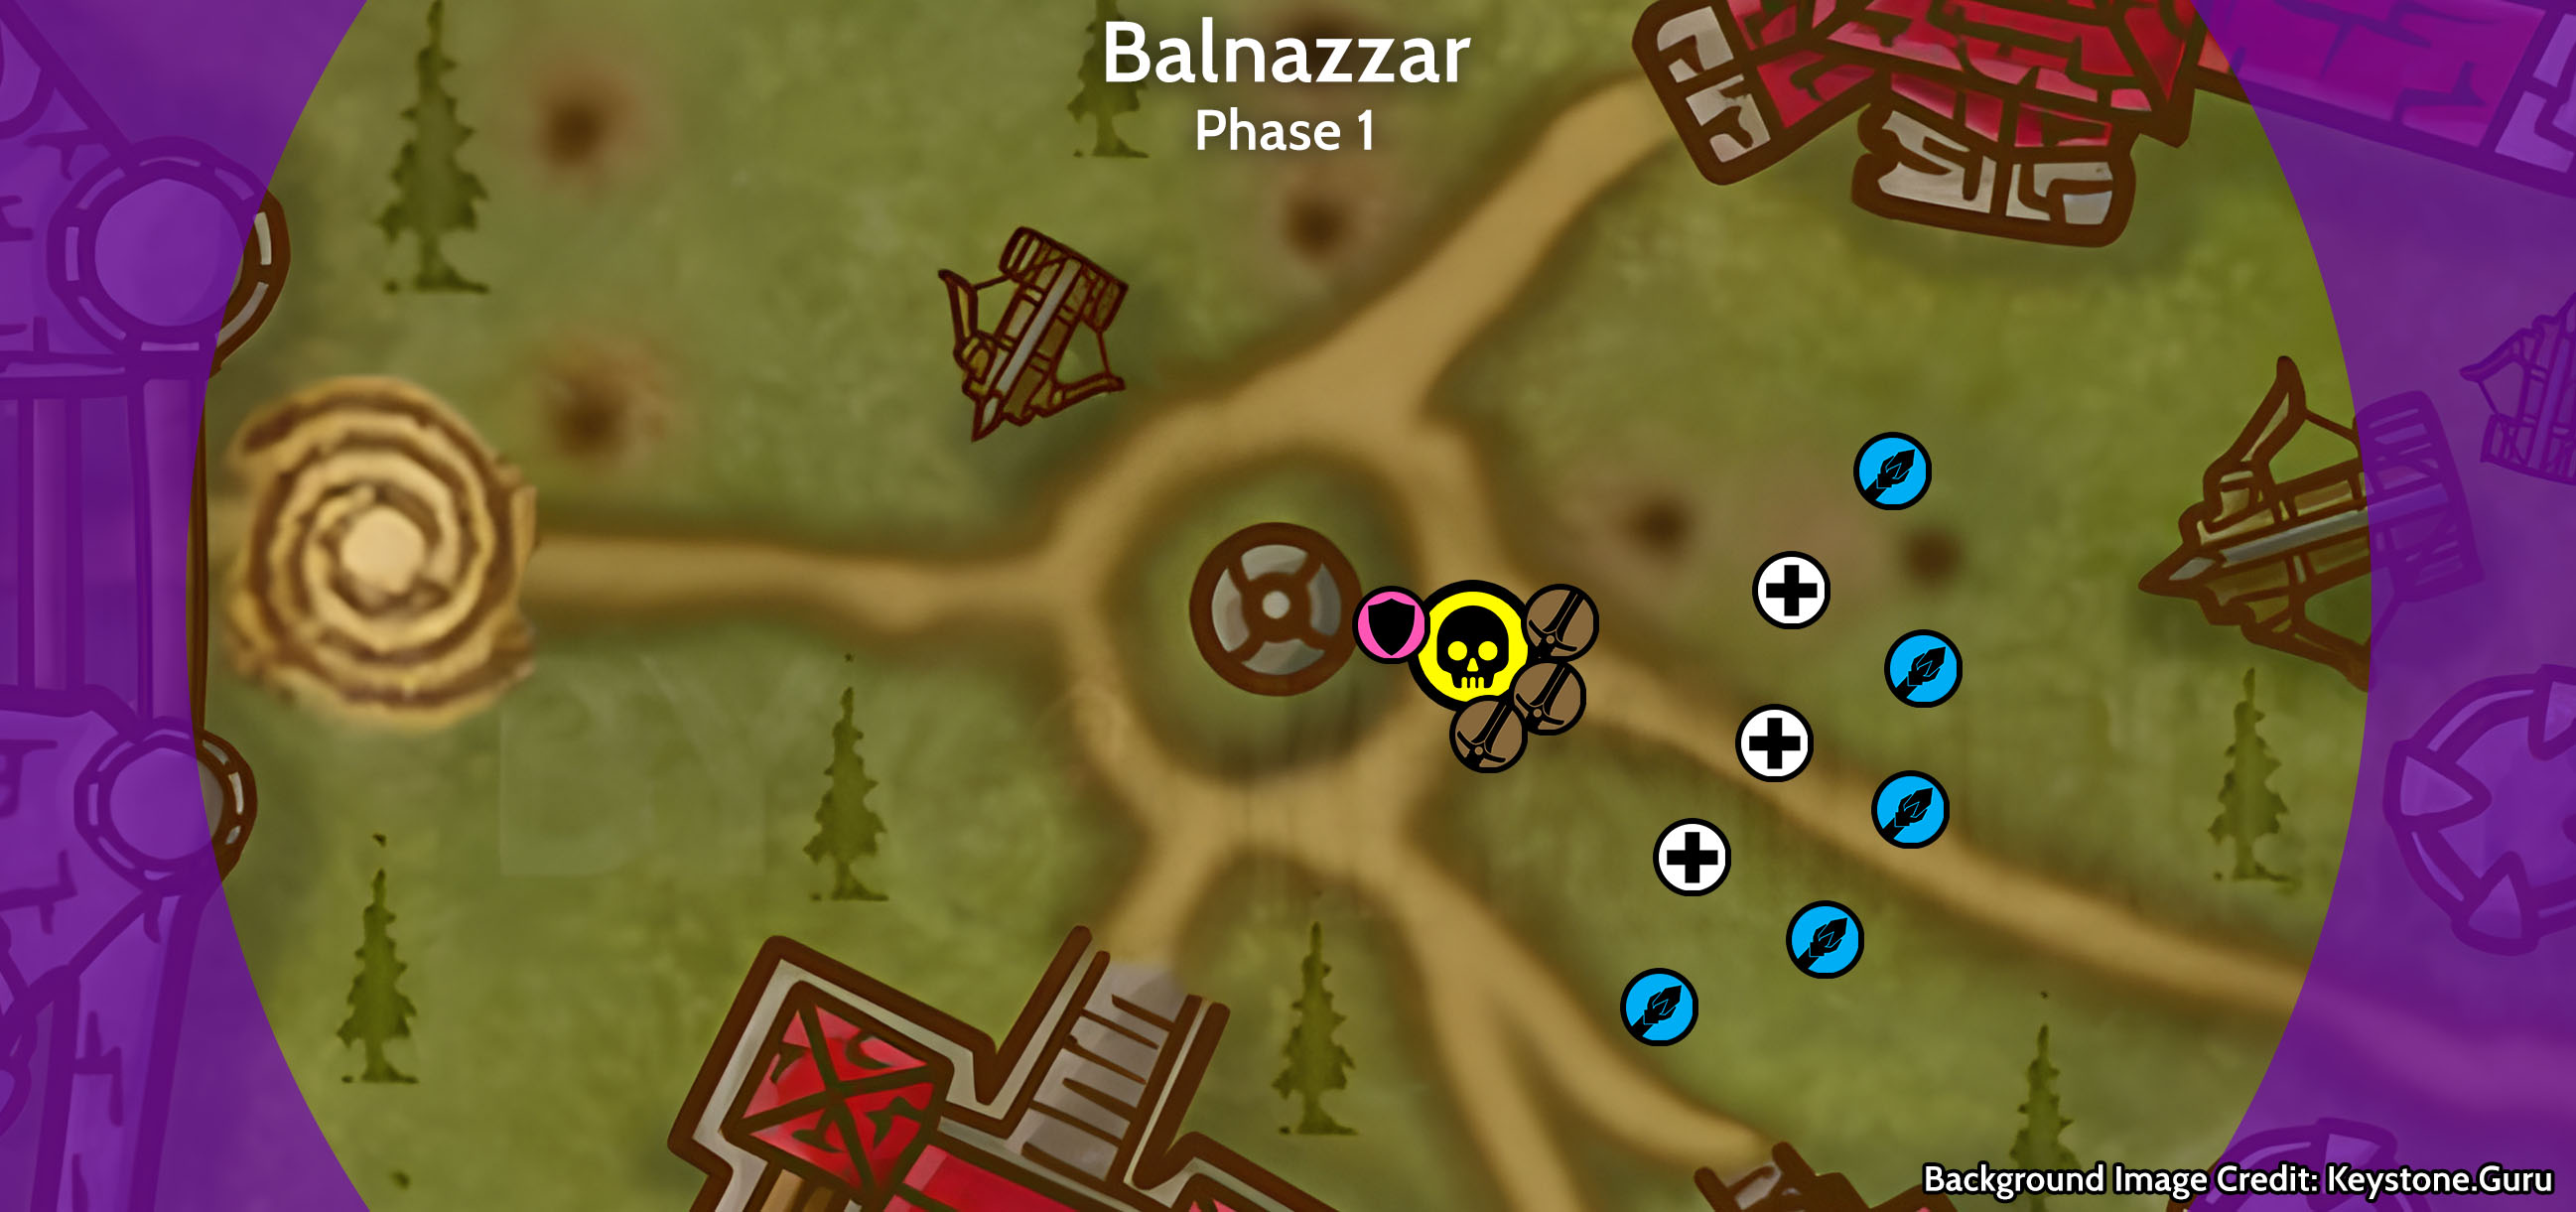
Balnazzar has a number of mechanics which persist through every phase of the fight:
Screeching Terror adds will periodically spawn. Cleave these down, focus them if you have many. They cast Screeching Fear around them, which is why it’s important to keep on top of these. However, the fear cast is kickable, and kicking it is more important than DPSing. It has a 2.5 second cast time.
Balnazzar himself will occasionally cast Carrion Swarm on players within 15-20 yards of him. Anyone infected with it will damage all other players within a few yards of them.
Carrion Swarm Mechanics
- This mechanic comes in two parts - spreaders, and victims. The spreader debuff lasts for 20 seconds and does not damage the source player. However, if there are players within 5 yards of a spreader, they will receive the victim debuff, which only lasts a few seconds but deals 300 damage per second to them.
- The spreader debuff uses the Carrion Swarm icon. The victim debuff is still called Carrion Swarm, but it uses a different icon.
- As long as victims stay within range of a spreader, the victim debuff will continuously refresh, though if they make enough room that it no longer refreshes, it’ll fall off quickly.
- The victim debuff stacks - if a victim is within range of 2 spreaders, they’ll have 2 stacks and take 600 damage per second.
- Spreaders will not take damage from their own spreader debuff, but they can be victims to another spreader.
Prey on the Weak is a permanent aura affecting all players in every phase of this fight. It will cause any players who are not within ~6 yards of another player to be attacked by mirror images of Balnazzar. This looks sort of like the Hakkar HM Panther attack. This is less punishing in phases 2 and 3 due to mechanics in those phases encouraging clustering.
Prey on the Weak and Carrion Swarm punish you for doing the exact opposite of each other.
Melee will need to lightly spread to reduce stacks and take less damage from Carrion Swarm, but don’t spread so much that you take more damage from Prey on the Weak.
Casters/healers should stick to a buddy system, so they don’t take damage from Prey on the Weak while they also harm, at maximum, only one other player from Carrion Swarm, if they happen to get hit with it.
Phase 2 (Air Phase)
Begins at 70%, ends at 40%.
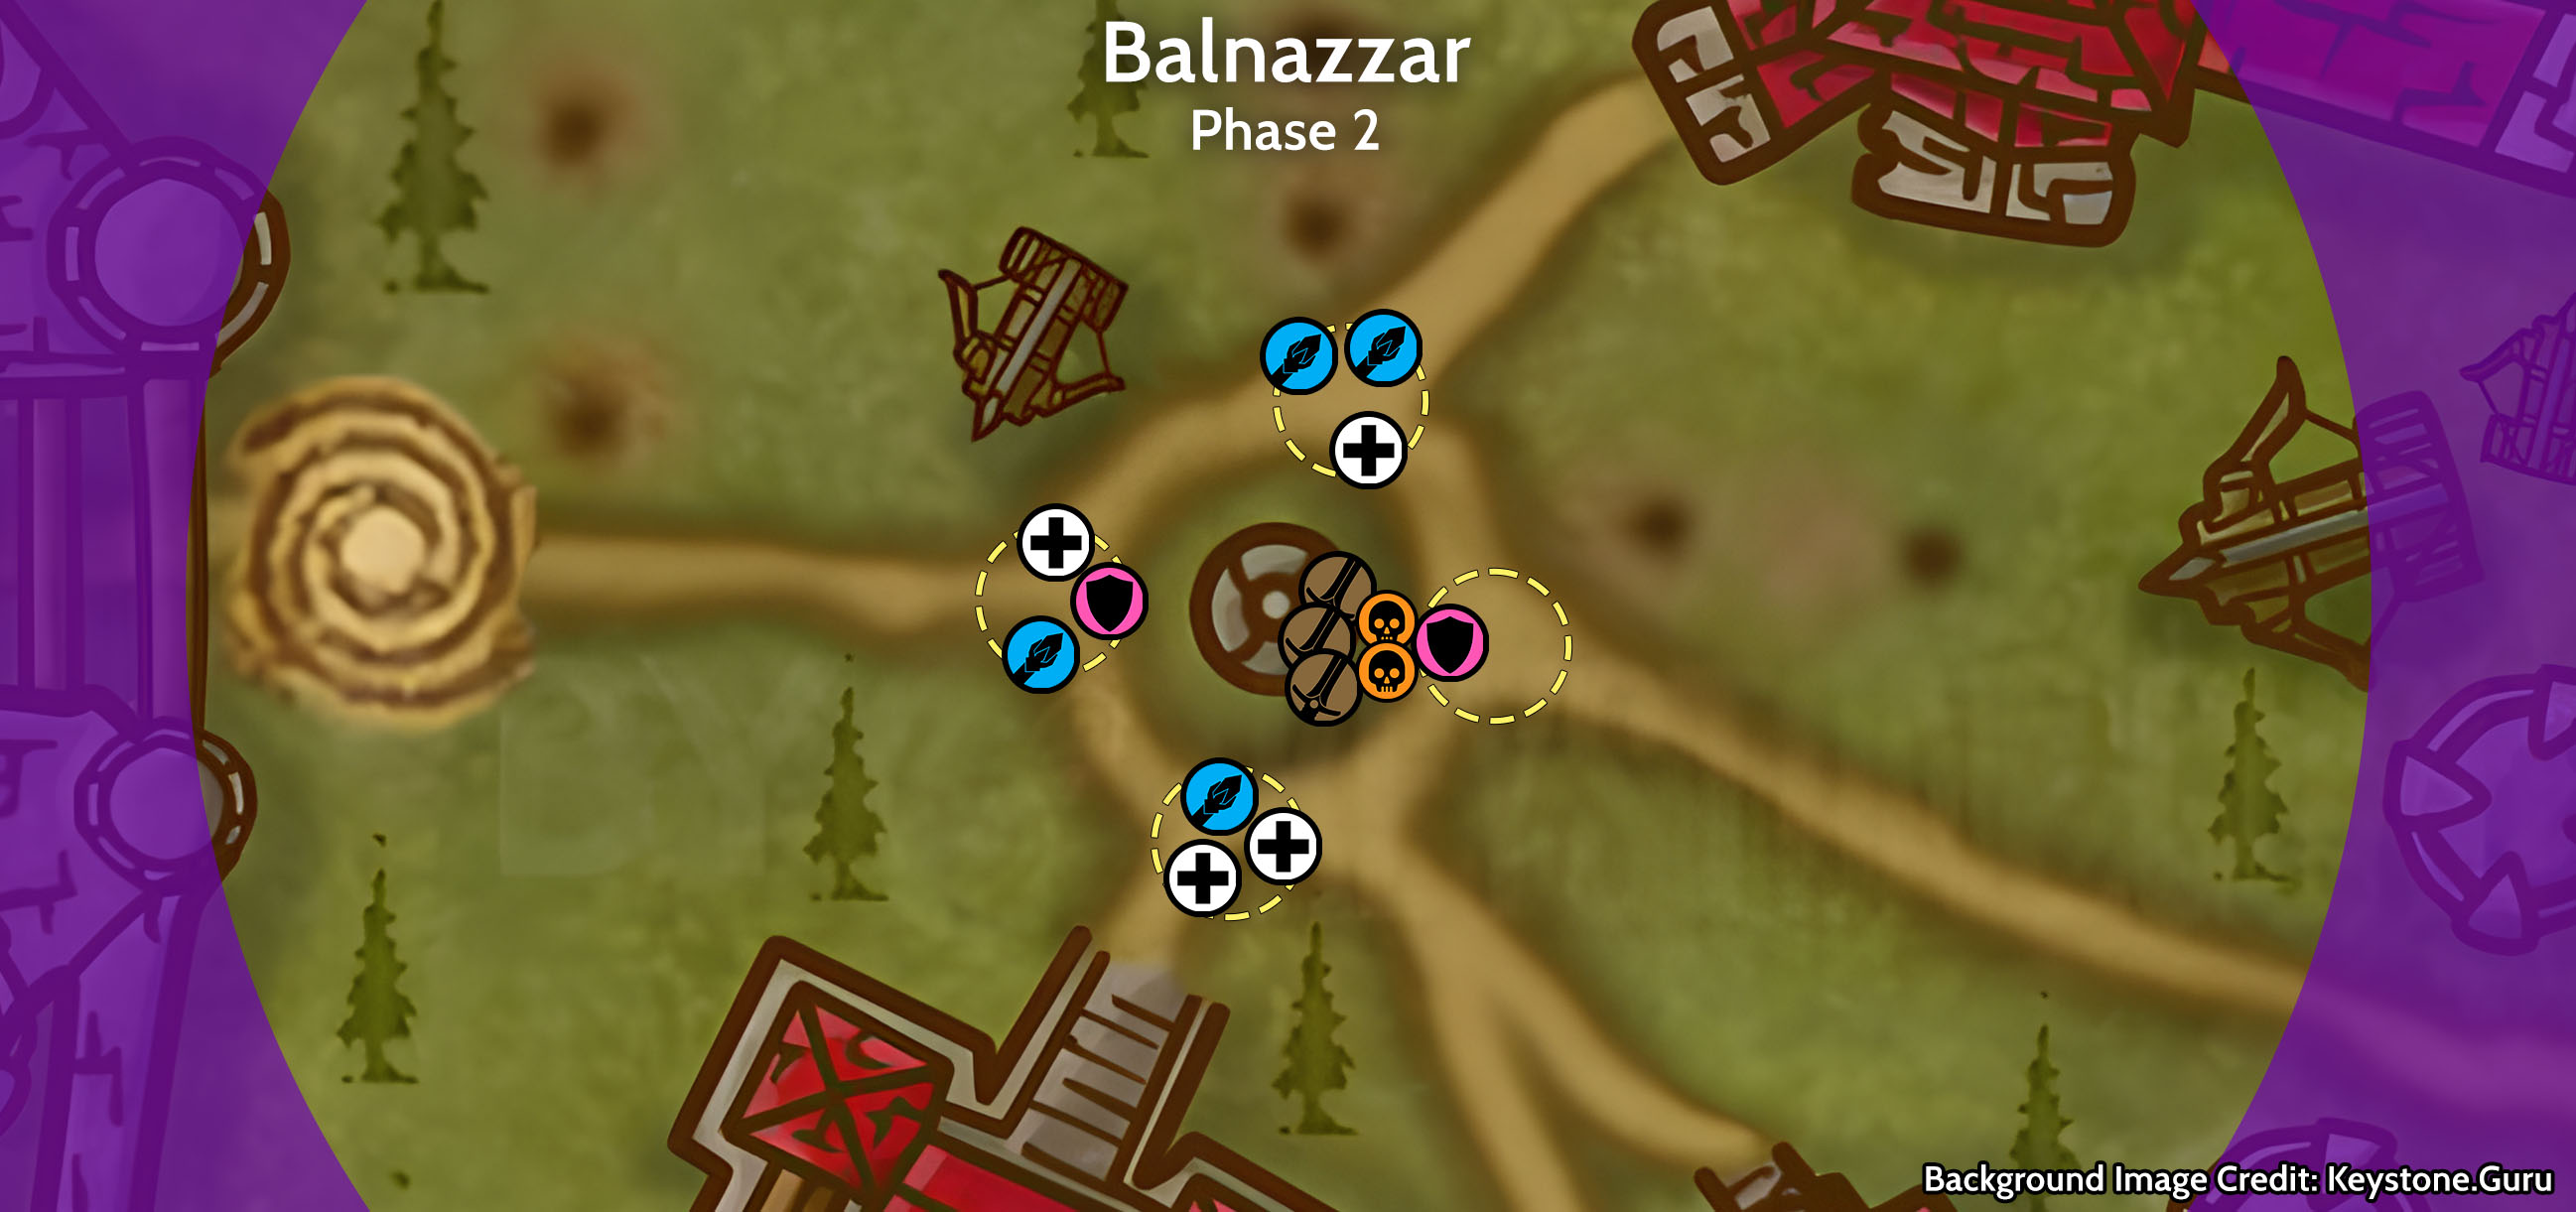
Balnazzar will run to the easternmost corner of the central fountain before flying up into the air and circling the area.
Starting with Phase 2 and for the rest of the fight, he emanates an aura called Suppressing Darkness on the whole raid, silencing everyone.
Four Scarlet Lightbearers will spawn around the fountain and channel Light’s Hope, creating a holy zone near them. This effect will make nearby players immune to the silence of Suppressing Darkness, however it will also enrage the Screeching Terror adds. Additionally, if Screeching Terror adds run free, they can interrupt the channeling of Light’s Hope.
During Phase 2, Ranged and healers should divide amongst the North, West, and South holy zones. Ranged should be focusing the boss, though help on adds if they get out of control.
The main tank should be positioned in the Eastern holy zone (the spot Balnazzar flies up from), so they aren’t silenced and can taunt. They should tank adds here, but make sure the adds are positioned outside of the zone themselves so they don’t enrage. Melee should stand outside of the zone and DPS the adds during this phase. Rather than full cleave, you should be focusing down specific adds so you can minimize how many are up at once, since more adds = more fear casts.
The other tank(s) should hop around between holy zones, picking up any additional adds that spawn before bringing them to the Eastern kill zone.
Keep in mind that Balnazzar’s Phase 1 mechanics still persist in Phase 2. Everyone is affected by Prey on the Weak. Additionally, since he’s now flying around, he’ll often come within 15 yards of all players, so everyone is now eligible for Carrion Swarm as well.
If a caster becomes infected with Carrion Swarm, try to spread just enough to nullify it without spreading so far that you move outside of the holy zone. If you can’t manage to do that, it’s better for DPS to move outside of the holy zone and get silenced - temporary DPS loss is better than permanent player deaths. Healers should stay within holy zones at all costs, since without heals this fight wipes quickly. DPS leave to allow this if necessary.
It’s not a bad idea to run 4 tanks and position one at each holy zone to ensure Screeching Terrors never make their way into one. You’ll lose some DPS by having more tanks, but this fight isn’t too much of a DPS race if you’ve got tanks reliably holding adds.
Starting in Phase 2, Balnazzar will also cast Circle of Domination, which mind controls players for 15 seconds.
The exact mechanics of how the MC works are not fully determined yet, but there’s a 6 second incubation period followed by a 15 second charm if it succeeds when the incubation period elapses. Ice Block and Divine Shield can cancel the MC if it succeeds.
Before pushing the boss into the next phase, you should focus down adds to ensure you have as few as possible when starting Phase 3.
Phase 3
Begins at 40%, ends at 5%.
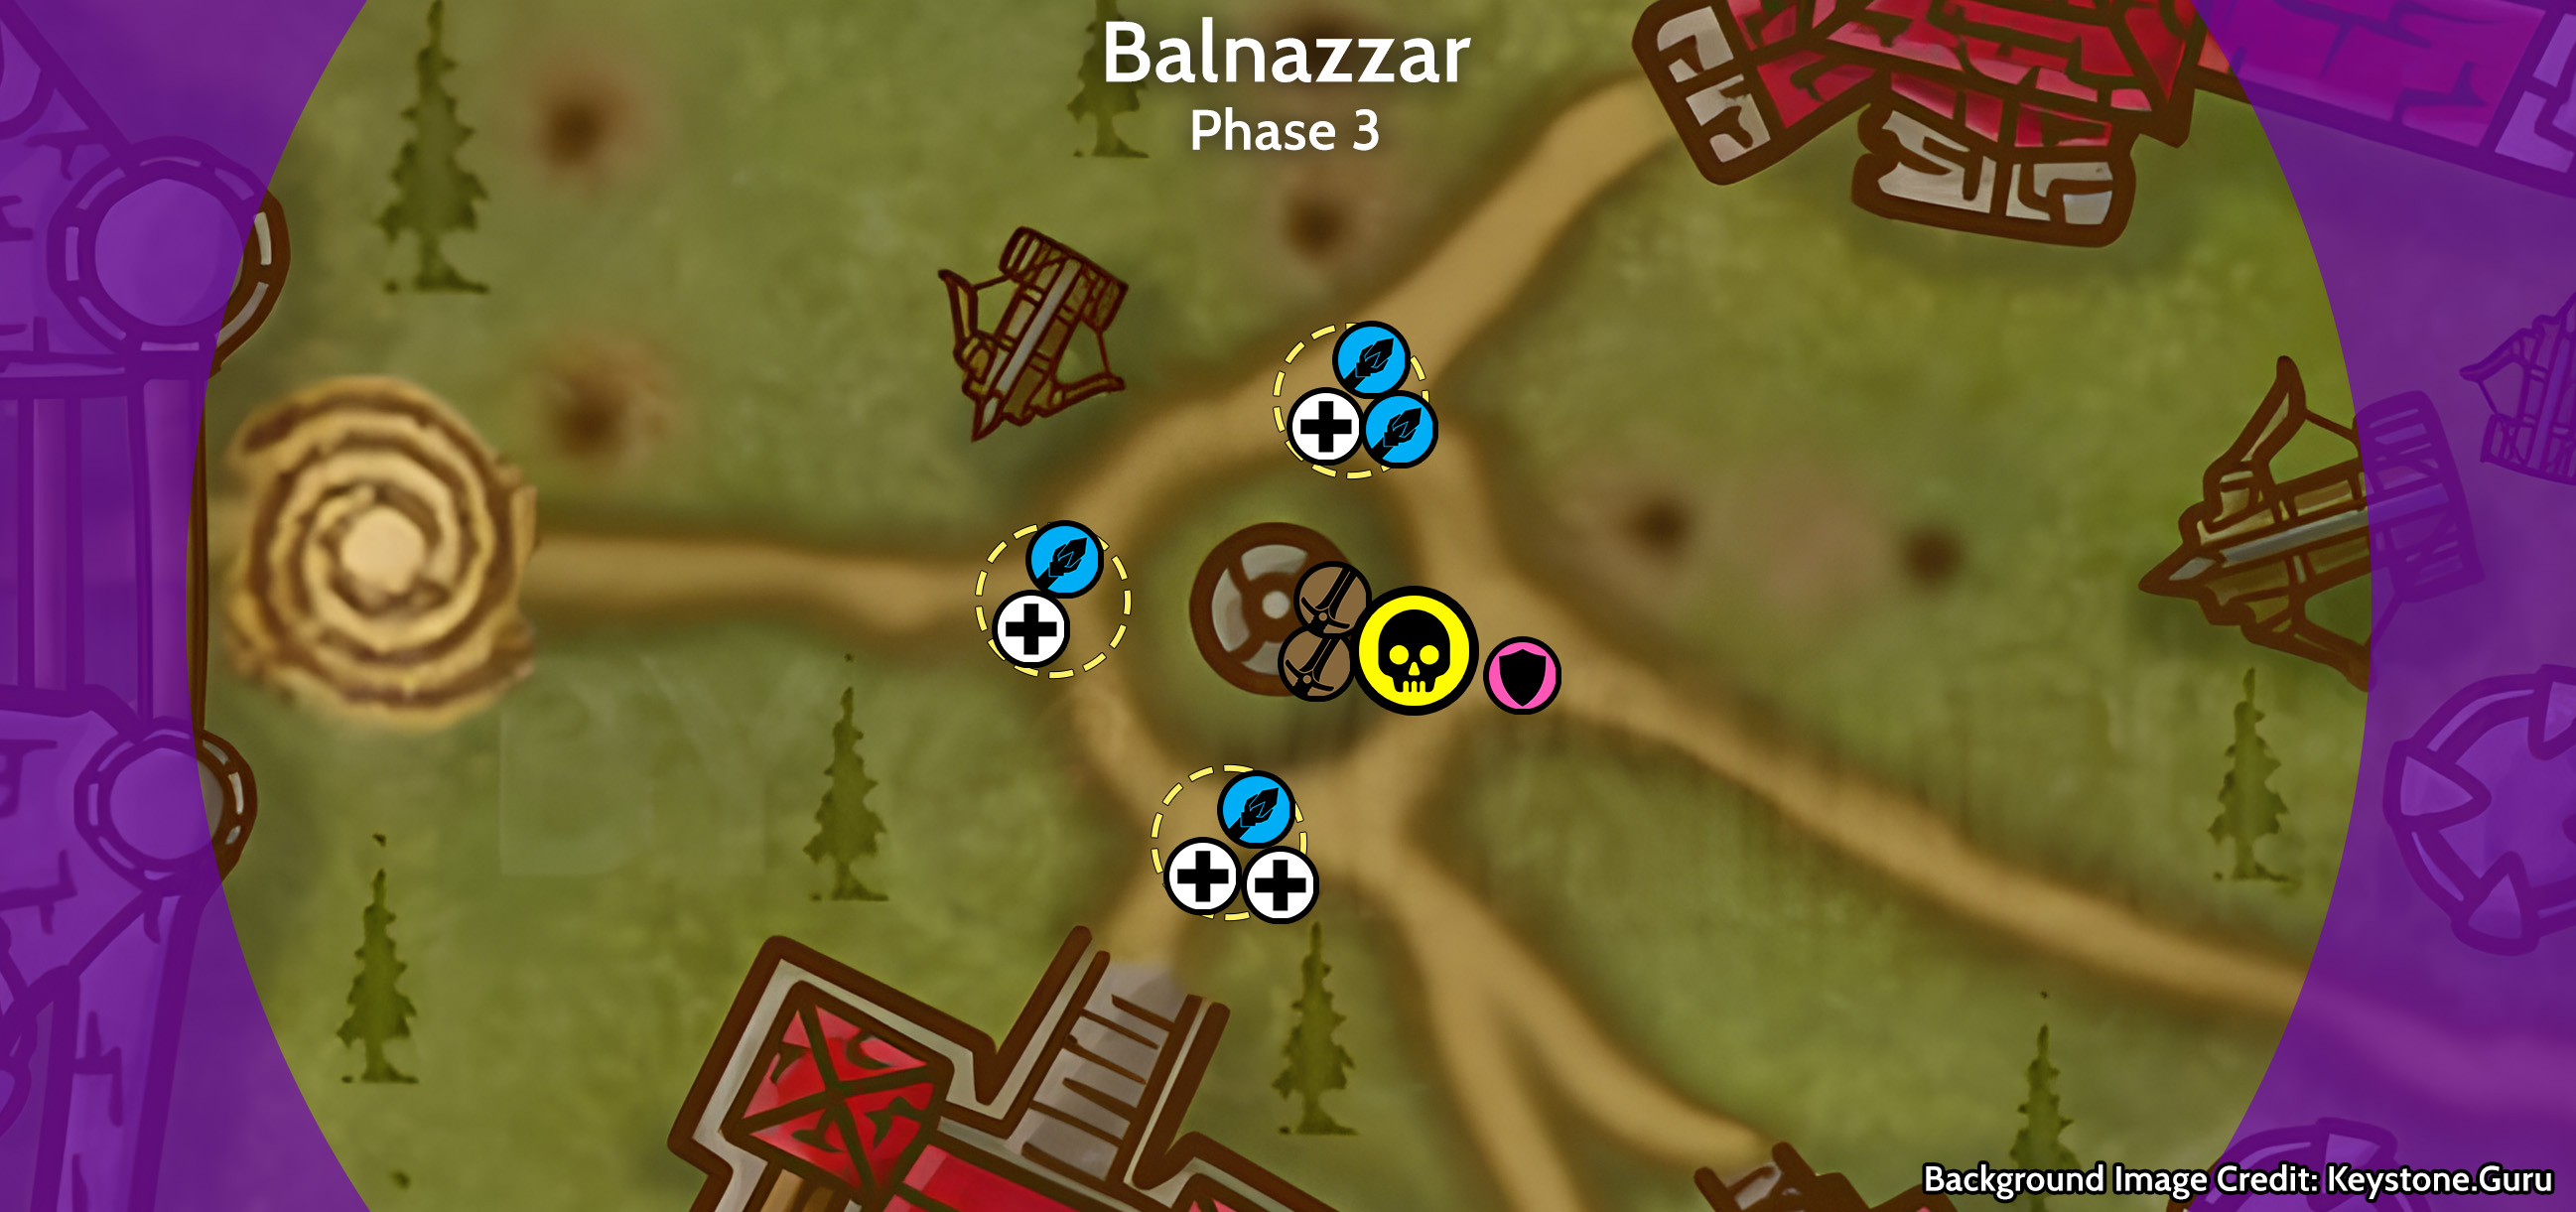
When Balnazzar lands, the MT should pick him up immediately, just like Onyxia, as casters will probably be at the top of his threat table. He will always land at the same spot, near the easternmost holy zone he originally flew off from, so pre-position there.
In this phase, most of your damage should be on the boss, but you still need to keep up with Screeching Terror spawns until the boss is around 20% - at that point, focus him and burn the remainder.
At 40%, 30%, 20%, and 10% health, Balnazzar will forcefully kill each Lightbearer closest to him, leaving you with 3, 2, 1, and 0, respectively.
Each time he kills a Lightbearer, Balnazzar will spawn an Infernal in their place. They have Infernal Presence which will lightly damage nearby players but make those players immune to Suppressing Darkness, just like Light’s Hope did.
Hold Infernals near the boss and have melee stack on them as needed. Casters/healers should stay in the holy zones that are still up until all of the Lightbearers die, then move to Infernals as necessary.
Balnazzar dies at 5% with a long roleplay.