Last updated: 4/28/25
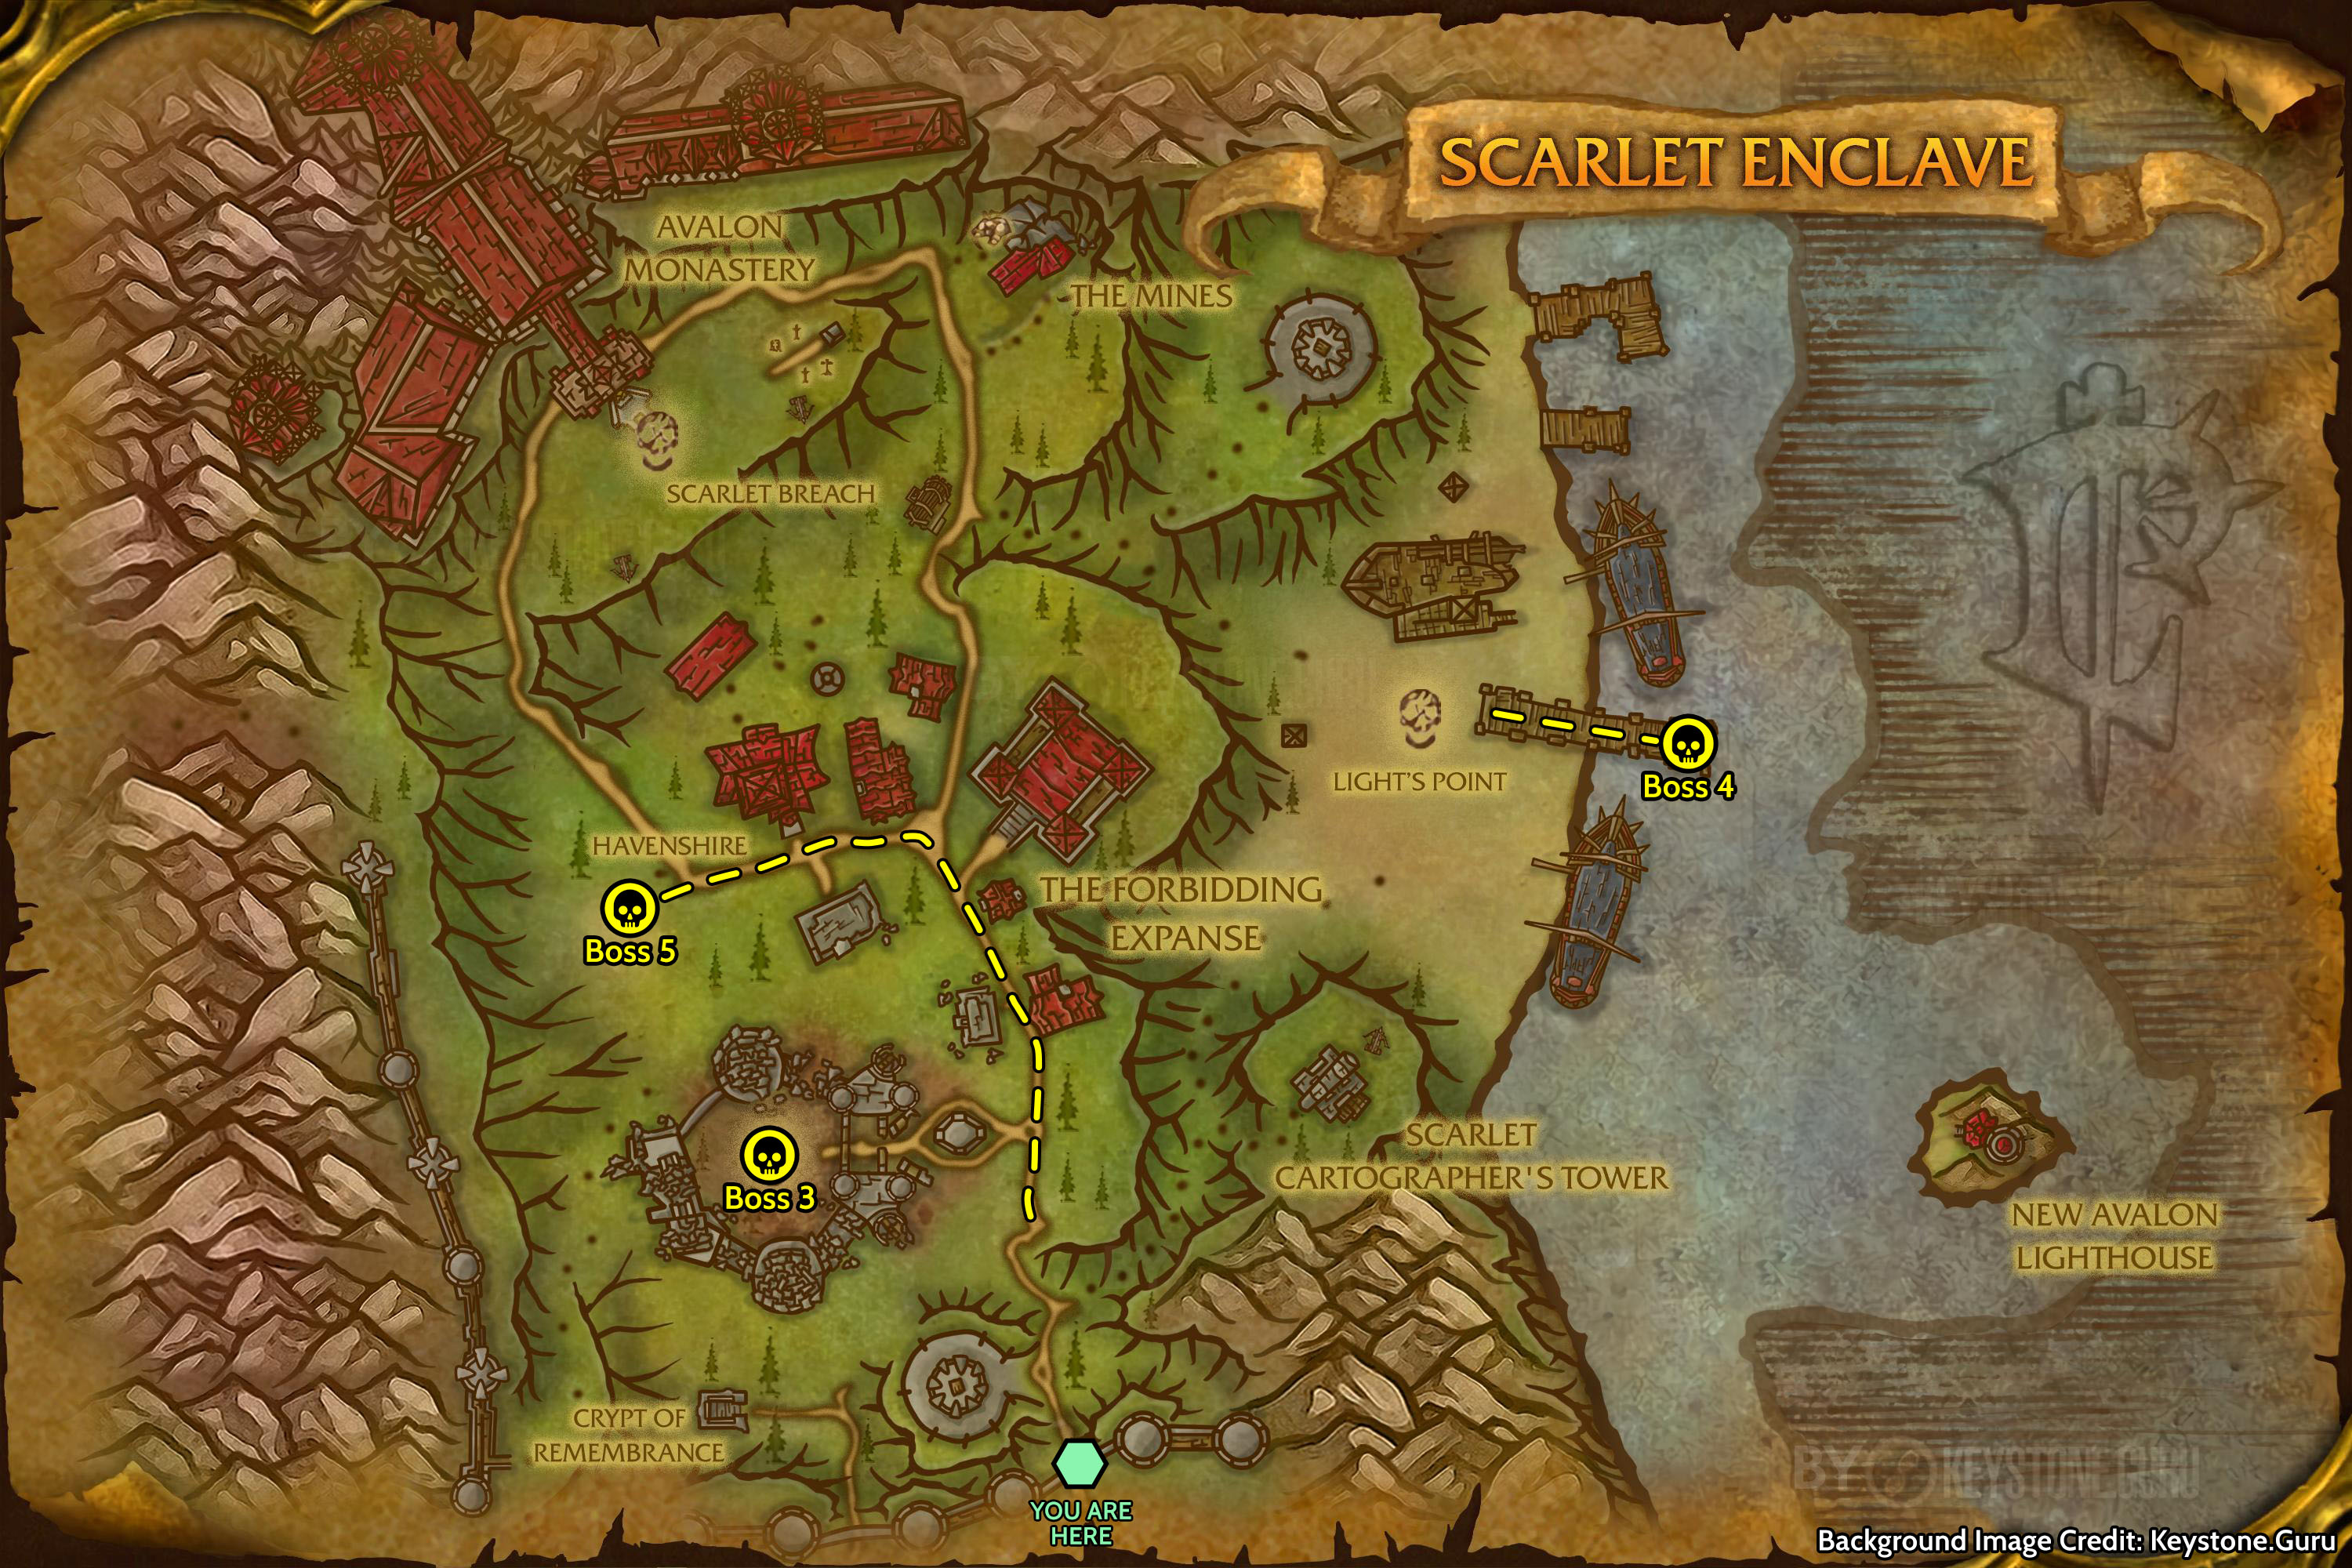
After killing Beatrix, the next area opens up north of New Avalon. The next 3 bosses may all be fought in any order you wish, but all 3 must be killed in order to progress to the next zone of the raid.
Boss numbering is based on Warcraftlogs - it may not make sense to pull them in this order for your raid group.

Be aware that after Boss 5 has been pulled once, it begins patrolling up and down the road.
There’s a lot of trash in this region. Mob types from Tyr’s Hand will show up again, but ones from New Avalon will not. To recap:
- Scarlet Cleric: These use Holy Radiance, a massive AoE burst that must be interrupted or it can wipe the raid.
- Scarlet Knight: These use Ret Aura, so melee watch your thorn damage. They also Disarm.
- Scarlet Paladins: These use Consecrate, avoid it.
- Scarlet Praetorians: These use Whirlwind, avoid it.
However, there’s also a lot of new ones. The important ones are:
- Lightgorged Whelp: When these die, they explode in an Unstable Detonation. The range cannot be avoided, just make sure you kill them one at a time and not all at once so your healers have time to compensate. Deals 1k raid-wide damage per explosion. After being in combat for 30 seconds, they will prematurely detonate regardless of their health.
- Scarlet Cavalier: These knights aren’t a big deal, but they do Cleave.
- Scarlet Executioner: Mortal Strikes the tank. Flagged as rare but not actually rare.
- Scarlet Medic: These are mostly just priests that single target heal, but they also have a special Consecration ability that, unlike a normal Consecrate that just damages enemies, will also dramatically heal their allies within it. This looks like a giant holy circle on the ground.
- Scarlet Spellbinder: These cast Frost Nova, which can trap you inside of Praetorian Whirlwinds. They can also summon a Frozen Core, which impacts the ground after 8 seconds, sort of like Sapphiron’s mechanic. This deals a massive amount of Frost damage in a short 10 yard radius, so run away from it. Be aware that the circle grows in size as it gets closer to impact.
There are also a few Captains in this region, similar to the first region. Most do not need to be pulled to activate bosses, but they may get in the way if you don’t.
- Inquisitor Tenn Flamecaster: Located in front of Boss 3. He uses Wyvern’s Breath, which causes him to slowly spin in place and deal damage to anyone within a short cone in front of him. He will also periodically roll 5 fire boulders away from him; avoid them.
- Captain Jorn: Located north of Tenn. Mostly just an annoying Ret Paladin with a lot of health. He’ll Enrage when low on health so burn him down when he does.
- First Mate Kip: He stands atop the scaffolding next to the work-in-progress ship on the beach. He Disarms and has various stuns. Kip must be killed to spawn Boss 4.
Checkpoints
This new area grants access to the Central Watchtower almost immediately as you enter it. Don’t forget to light the Bonfire on top of it to unlock this checkpoint at the Flight Master!
There is also a North Watchtower above the docks, but there are a lot of trash packs defending it. Only worry about clearing it once Bosses 3-5 are all dead.